Lead Management Reports
The reports section has been divided into the following 6 sections
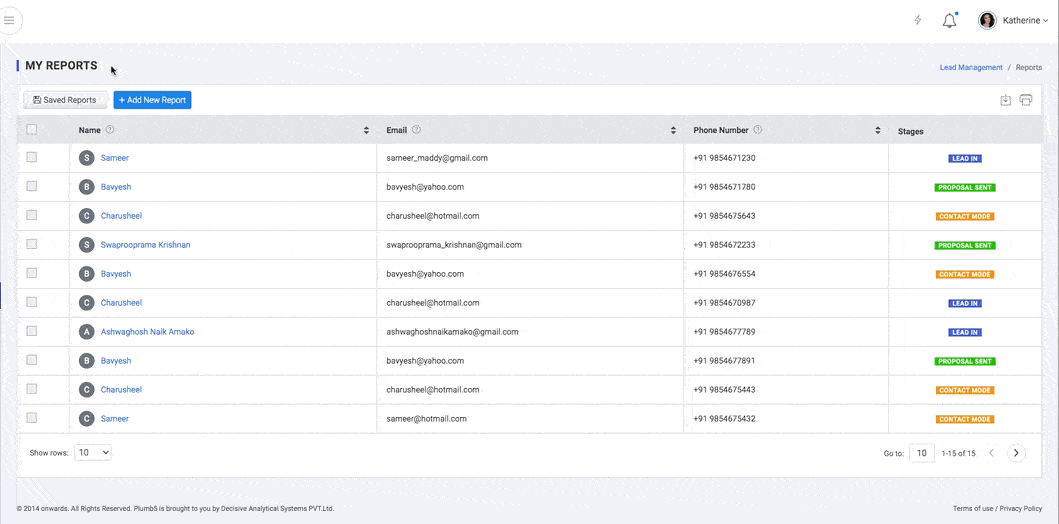
My Reports
This section can be used for creating customized reports.
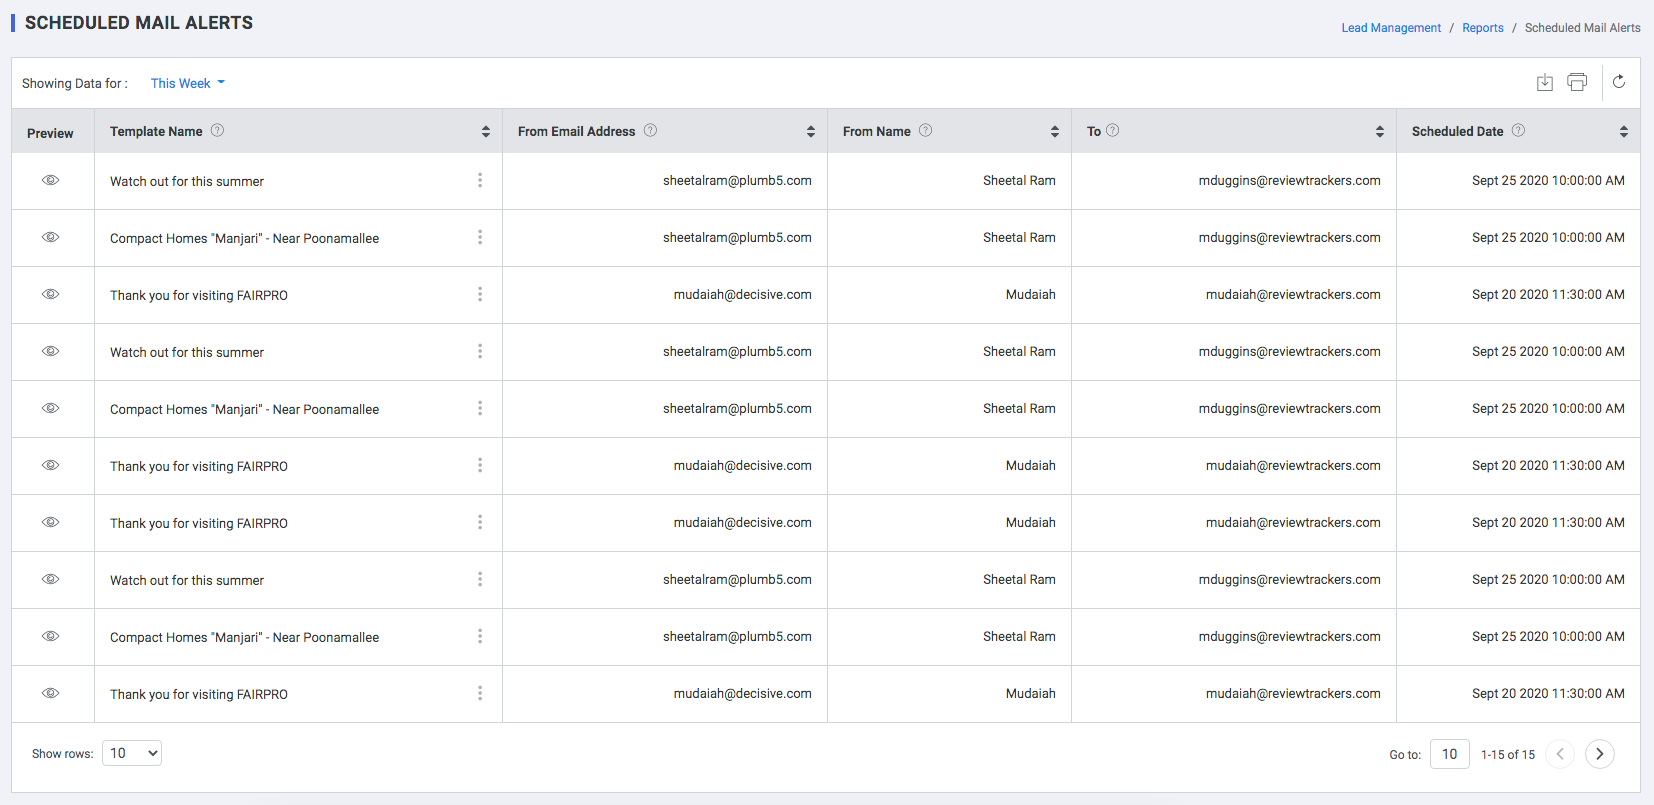
Scheduled Mail Alerts
Mail Alerts Scheduled for the time period selected
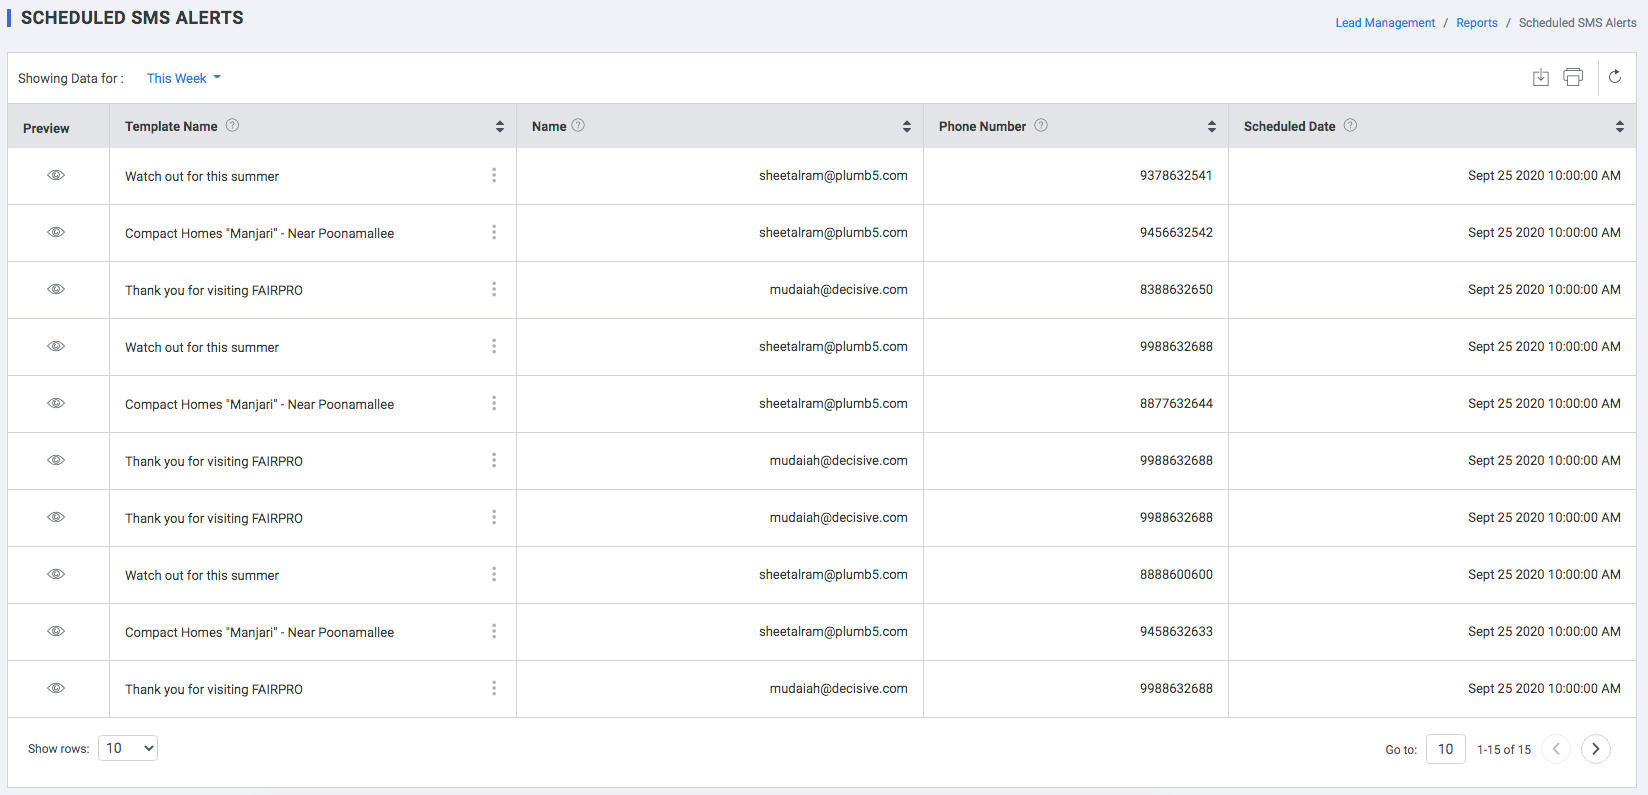
Scheduled SMS Alerts
SMS Alerts scheduled for the time period selected
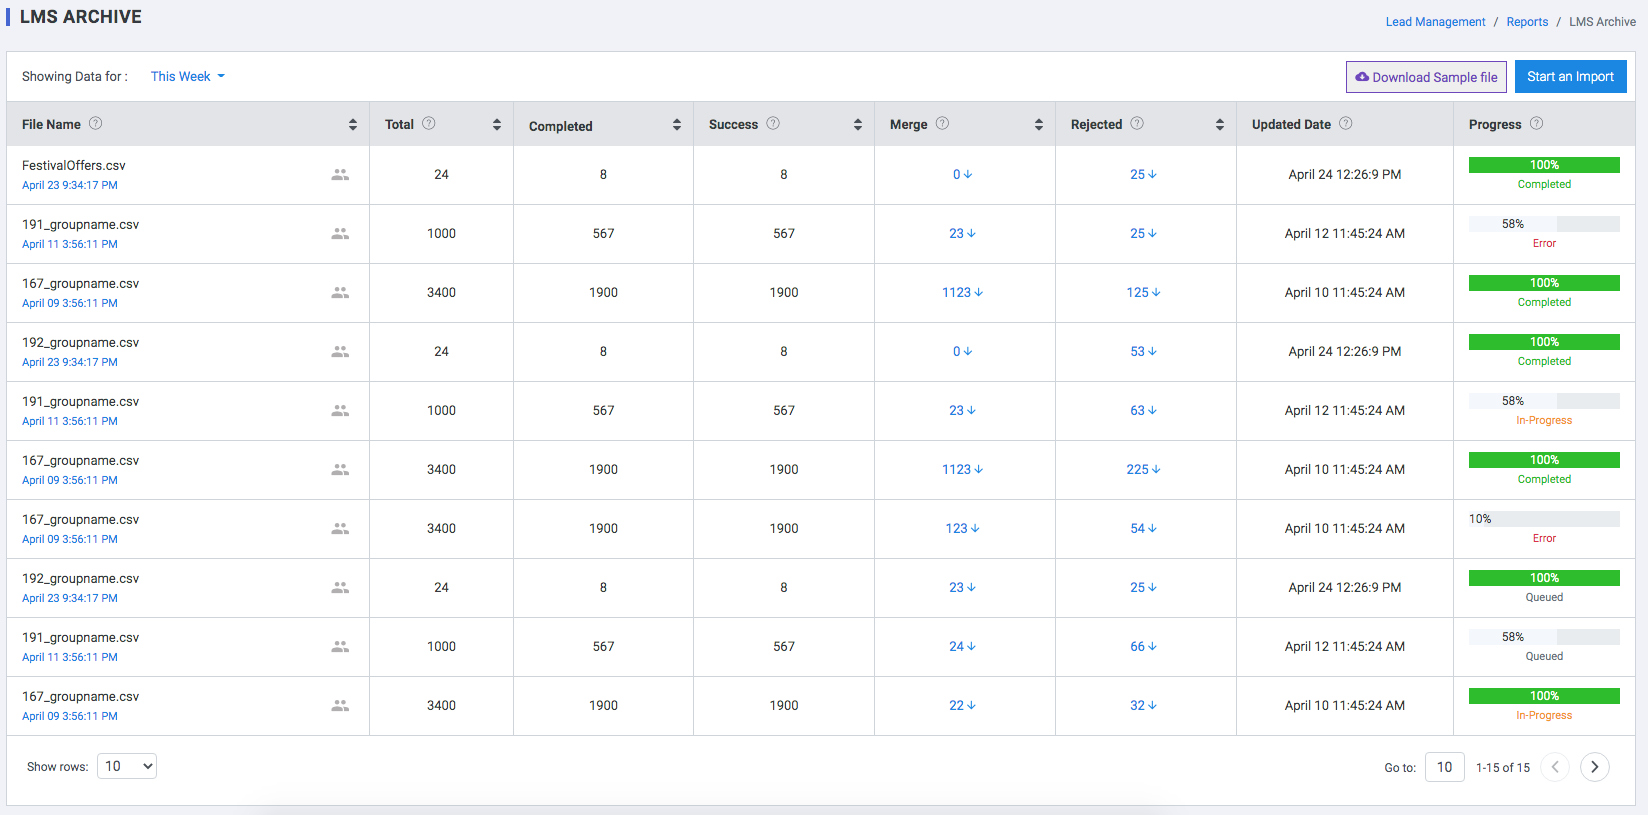
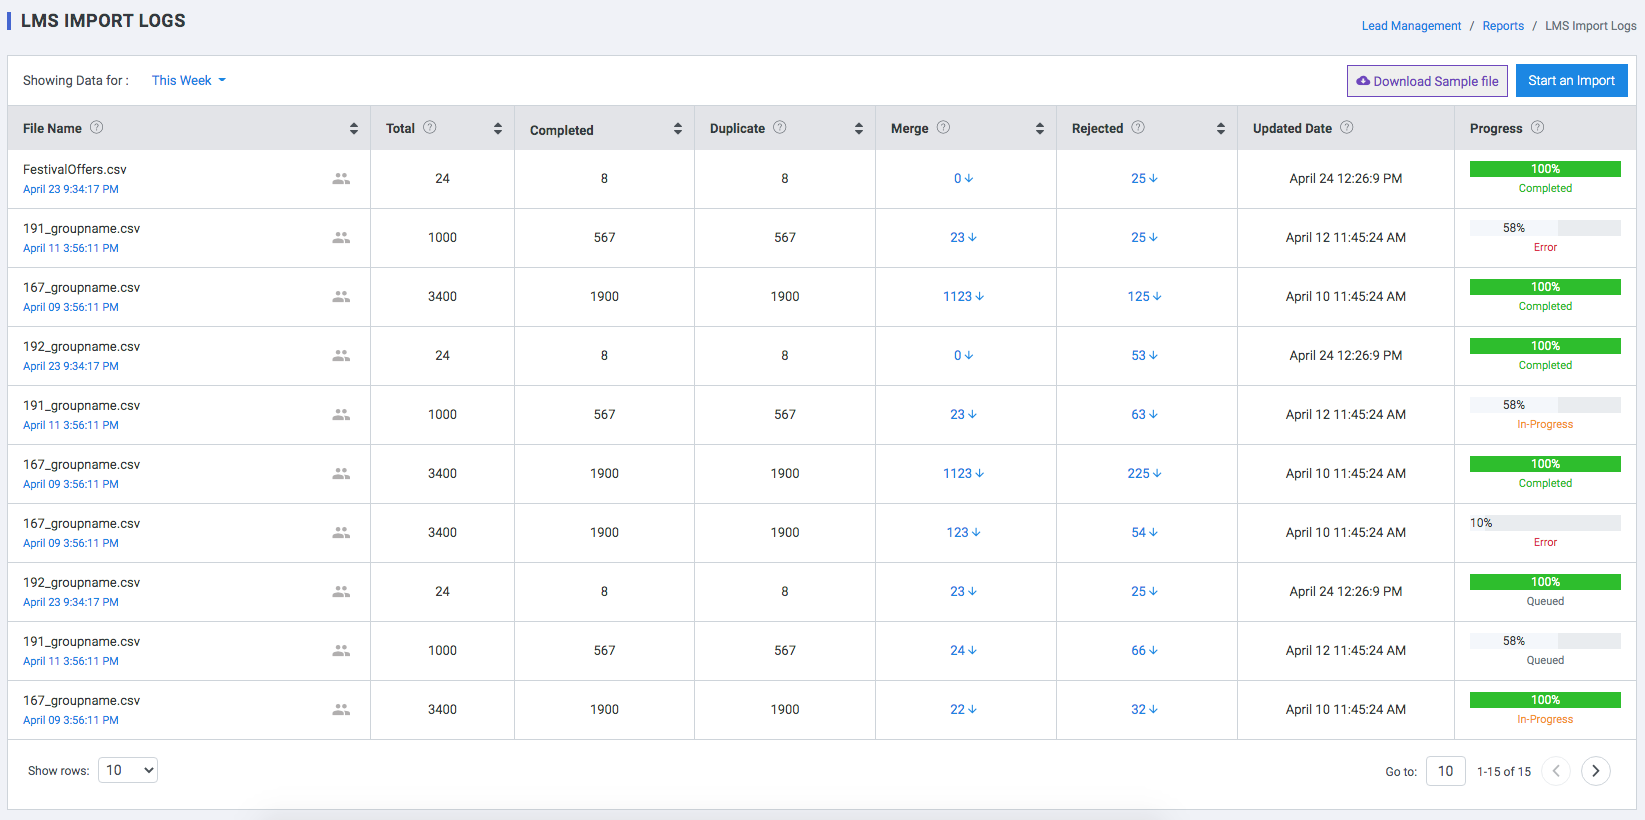
Import Log
Import files to create or update contacts, groups, or other contact related information in Plumb5.
Setup your Import files
Format your import data correctly on your computer to prevent any errors when importing objects to Plumb5.Requirements for all import files
- The import file must be .csv, .xlsx, or .xls file.
- The import file should only have one sheet.
- The import file should contain a maximum of 250,000 rows and is smaller than 200MB. Include a header row in your file.
- Each column header should correspond to a property that exists for the object type being imported.
- During the import process, Plumb5 will match the column header to the property name, where possible, to map the property values to be updated. Otherwise, you can manually map your column headers to property values.
Import to create or update contact records in one file
Follow these steps when you want to bulk create or update records.
- Ensure that your import file is already set up correctly.
- In your plumb5 account, navigate to contacts -> Import Contacts
- Click Start an import.
- Select the group you want to import
- Select File from computer
- Click choose a file and in the dialog box, select your import file. In the bottom right, click Next.
- On the Map columns in your file to contact properties screen, plumb5 will match the columns in your file to your selected properties based on the header and the property name. You'll see a preview of the property values from your spreadsheet in the Preview Information column.
- If any columns do not match an existing property, click the corresponding dropdown menu. You can do opt to do one of the following:
- Select an existing property to map the column to.
- Click Add new field to set up a new custom property in the right panel. The data in the column will now be mapped to this new custom property.
- Select Don't import columns to skip importing this column from your spreadsheet.
- If you're not intending to import any data in the unmatched columns, you can select the Don't import data in unmatched columns checkbox to skip these columns.
- Once all columns are mapped or you've opted not to import data in the unmatched columns, click Next.
- On the details screen, enter an Import name.
- Once you've set the options for your import, click Finish import in the bottom right.
Archives
List of archived Imports.