Settings
Step by step guide for Integrating Email Service Providers in plumb5.
Configuration
In this section you can configure Settings for the Email Service Provider(ESP)
Sender Email Ids
Configure Authorized Email ID that will be used in the From Address field.
Email Service Provider (ESP)
We'd love to add you to our Service Partner Network! Please feel free to initiate a conversation by dropping an email at support@plumb5.com with the following details:
A static endpoint which listens to incoming HTTPS POST requests and adheres to the specified schema for sending email.
Provider Name: List of all the ESPs for which we provide ready-to-use integrations
Promotional Settings: Promotional Channel Setting with Bulk Support
Transactional Settings: Transactional Channel Setting with Bulk Support
Domain Validation
Validate your Email Sending domain from the Service Provider. This needs to be done once all the MX records have been updated in the DNS Settings.

Custom Unsubscribe
Link to the Unsubscribe Page that gets added to the Mail

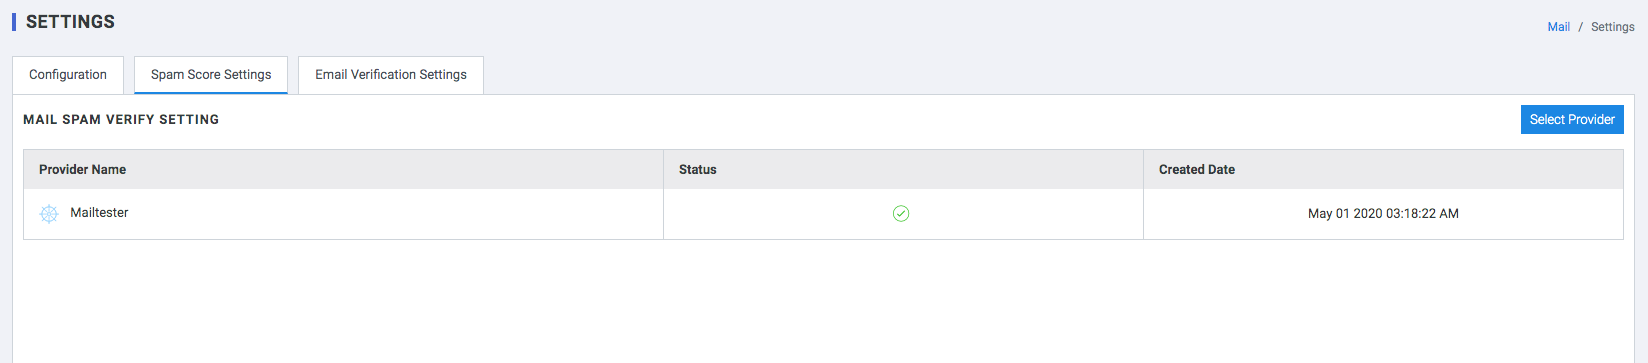
Spam Score Settings
Add the provider for Spam Score Check. Spam traps don’t belong to real people, and abuse account owners will mark your emails as Spam. Keeping them in your list will tarnish your sender reputation and even get you blacklisted.
This service enables you to Check the Spam Score of the mail using different checks that are performed:
- Syntax check
If the format is incorrect it will be reported why. For example: unsupported characters, missing @-sign.
- DNS lookup
Any problems looking up the domain (the part after the @-sign) in DNS (Domain Name System) will be reported.
- SMTP verification
If possible an SMTP connection will be made to a mail server that is responsible for the e-mail, and any issues are reported.
-
Provider Name
-
Status
-
Created Date
Email Verification Settings
Add provider for Email Verification Settings.

-
Provider Name
-
Status
-
Created Date
-
View
-
Edit
Setup SPF and DKIM For Your Domain
How to set up SPF/ Sender ID and Domain Key/ DKIM txt records in your domain's DNS settings?
We highly recommend our users to add the SPF and DKIM records for your domain. It is very easy to add the records, all you've to do is to go to your Domain-hosting/ Web-hosting website and login to your account to add the records. We've provided the steps of some of the most popular Domain-hosting/ Web-hosting websites. However, if you are not able to find the steps related to your Domain-hosting/ Web-hosting website, please contact your Domain-hosting/ Web-hosting websites.
Alternatively, you can also contact your system administrator/ network administrator to configure the SPF and DKIM records in the DNS settings of your domain.
Note: To add the DomainKey/ DKIM public key, you need to create a subdomain in your domain’s DNS settings.
Below are a list of commonly used domain/ web-hosting sites and the instructions for adding our server (zcsend.net) to their TXT records.

GoDaddy To setup SPF
- Log in to your account at www.godaddy.com by clicking the My Account tab.
- Go to the Zone File Editor for the domain name you want to update.
- Click Add New Record. The Add DNS Record window displays.
- From the Record type list, select TXT (Text).
- Complete the following fields:
- TXT Name — Enter the host name for the TXT record. For example, type @ to map the record directly to your domain name. (This field is labeled Host in the TXT (Text) section of the Zone File Editor.)
- TXT Value — Enter the value you want to assign to the record (e.g. v=spf1 a mx include:_spf.elasticemail.com ~all).
- TTL — Select how long the server should cache the information.
- Click OK.
To setup DKIM/ Domain key
- Log in to your account at www.godaddy.com by clicking the My Account tab.
- Go to the Zone File Editor for the domain name you want to update.
- Click Add New Record. The Add DNS Record window displays.
- From the Record type list, select TXT (Text).
- Complete the following fields:
- TXT Name — Enter the subdomain of your host name, such as www or ftp. (e.g. “api._domainkey”) (This field is labeled Host in the TXT (Text) section of the Zone File Editor.)
- TXT Value — Enter the value you want to assign to the record (e.g. k=rsa;t=s;p=MIGfMA0GCSqGSIb3DQ).
- TTL — Select how long the server should cache the information.
- Click OK.

HostGator To setup SPF
- Log into your Control Panel and click the Advanced DNS Zone Editor icon (if you do not have this icon, contact HostGator to request for it)
- Select the desired domain name from the dropdown menu
- Under Add a Record, enter the following information:
- Name: type your domain name (e.g. zillum.com)
- TTL: 1400
- Type: TXT
- Address: " v=spf1 a mx include:_spf.elasticemail.com ~all"
- Click the Add Record button.
To setup DKIM/ Domain key
- Log into your Control Panel and click the Advanced DNS Zone Editor icon (if you do not have this icon, contact HostGator to request for it)
- Select the desired domain name from the dropdown menu
- Under Add a Record, enter the following information:
- Name: type your subdomain domain name (e.g. api._domainkey)
- TTL: 1400
- Type: TXT
- Address: "k=rsa;t=s;p=MIGfMA0GCSqGSIb3DQ"
- Click the Add Record button.

HostMonster to setup SPF
- Log into your HostMonster Control Panel.
- Select the "DNS Zone Editor" icon in the "Domains" section.
- Select the domain you're modifying from the drop-down box.
- Scroll down to the heading named "Add DNS Record".
- Host Record: Enter @ for your main domain.
- TTL: Keep the default value: 14400
- Type: Select the TXT type
- TXT Value: Enter here your SPF record ( v=spf1 a mx include:_spf.elasticemail.com ~all)
- Click on the “Add Record" button to create the record.
To setup DKIM/ Domain key
- Log into your HostMonster Control Panel.
- Select the "DNS Zone Editor" icon in the "Domains" section.
- Select the domain you're modifying from the drop-down box.
- Scroll down to the heading named "Add DNS Record".
- Host Record: Enter your subdomain (api._domainkey)
- TTL: Keep the default value: 14400
- Type: Select the TXT type
- TXT Value: Enter here your DKIM/ domain key record ( "k=rsa;t=s;p=MIGfMA0GCSqGSIb3DQ")
- Click on the “Add Record" button to create the record.

Bluehost to setup SPF
- Log into your site’s Control Panel (e.g. login.bluehost.com).
- Select the DNS Zone Editor icon in the Domains section.
- Select the domain you want to modify from the drop-down menu.
- Scroll down to the heading named Add DNS Record.
- In the Add DNS Record area, enter your new DNS entry such as:
- Host Record: Enter @ for your main domain
- TTL: Keep the default value: 14400
- Type: Select the TXT type
- TXT Value: Enter here your SPF record ( v=spf1 a mx include:_spf.elasticemail.com ~all)Click Add Record to create your record.
- If you already have an SPF record, scroll down to the TXT (text) area to edit the one you already created, do not create two SPF records.
To setup DKIM/ Domain key
- Log into your site’s Control Panel (e.g. login.bluehost.com).
- Select the DNS Zone Editor icon in the Domains section.
- Select the domain you want to modify from the drop-down menu.
- Scroll down to the heading named Add DNS Record.
- In the Add DNS Record area, enter your new DNS entry such as:
- Host Record: Enter your subdomain (api._domainkey)
- TTL: Keep the default value: 14400
- Type: Select the TXT type
- TXT Value: Enter here your DKIM/ domain key record ( "k=rsa;t=s;p=MIGfMA0GCSqGSIb3DQ")
- Click Add Record to create your record.

- Go to CloudFlare.com>> My Websites.
- In the Settings (pull down menu) page, Go to DNS Settings.
- Add the new TXT record " v=spf1 a mx include:_spf.elasticemail.com ~all"