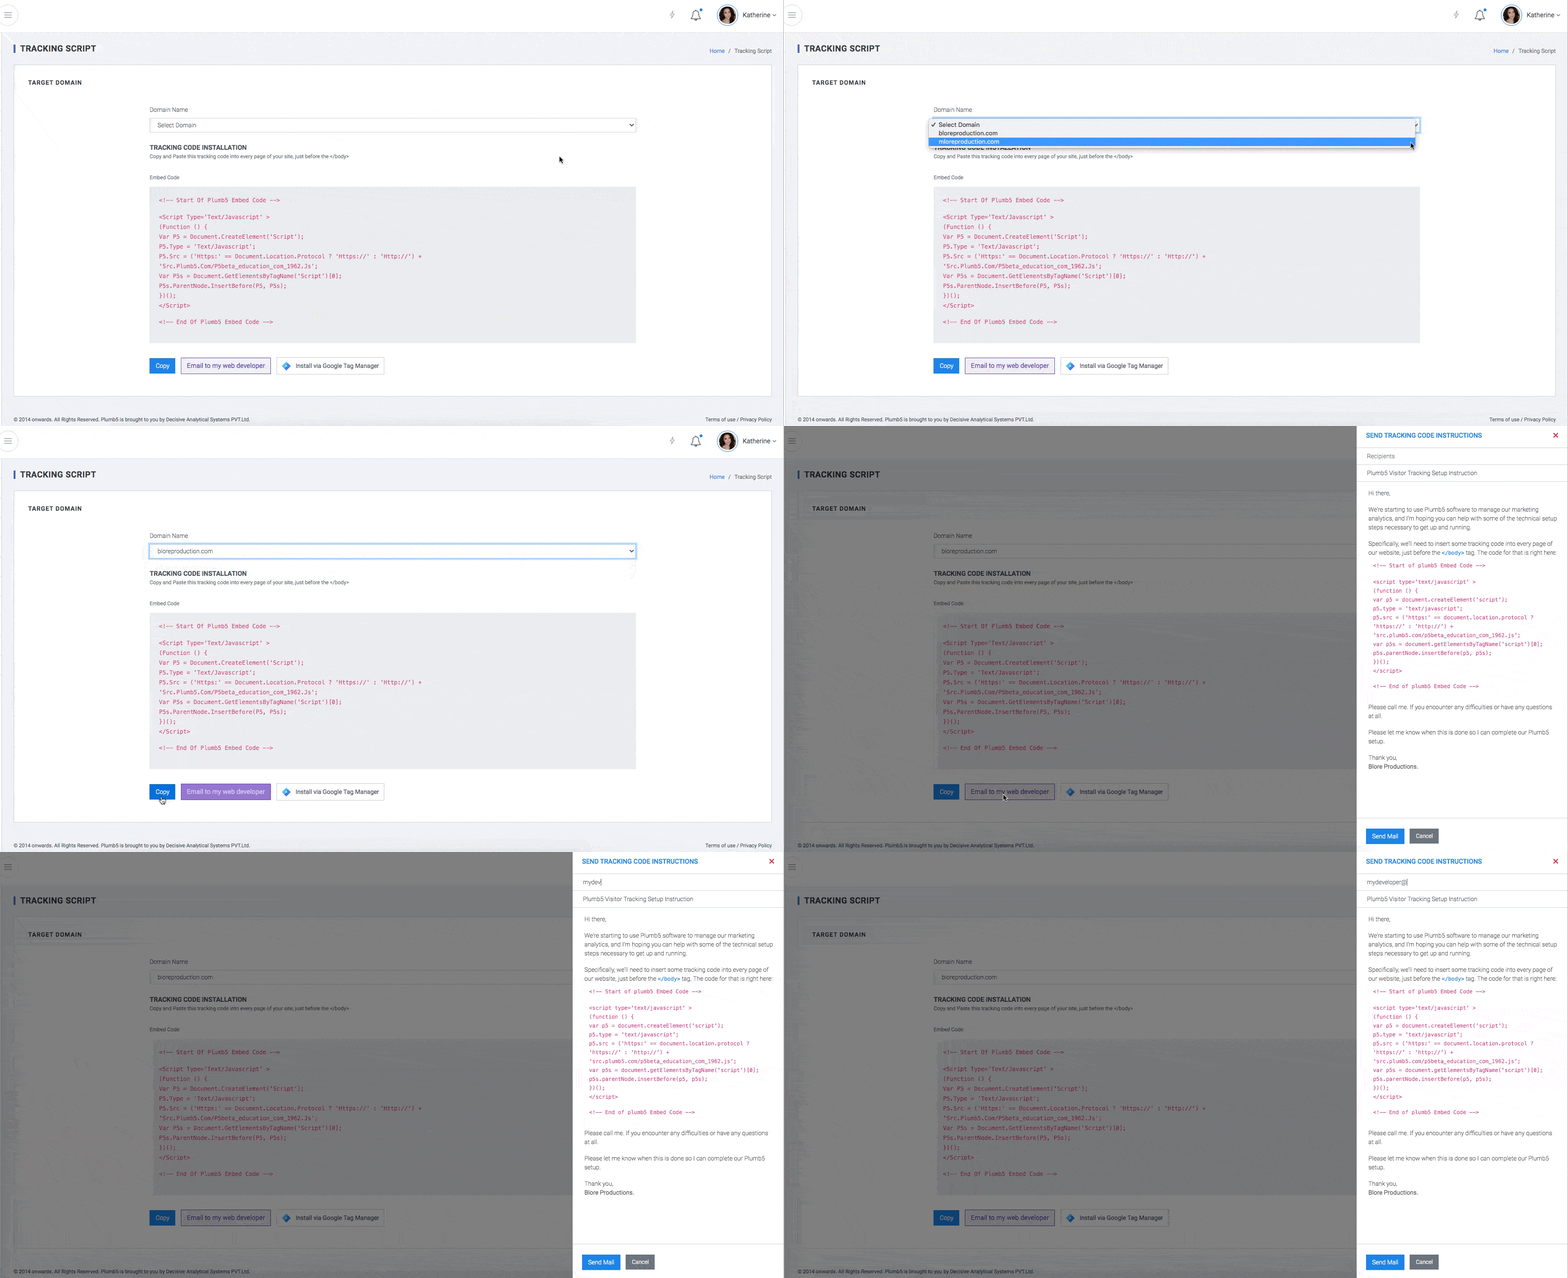
Install Tracking Code
The Plumb5 tracking code is unique to each Plumb5 account and allows Plumb5 to monitor your website traffic. You must install the Plumb5 tracking code manually to capture analytics for those pages.
Please note:
- You should not install multiple Plumb5 tracking codes on one page. If there are multiple Plumb5 tracking codes installed, the first one to load on the page will fire; any subsequent Plumb5 tracking codes will not load.
- If your IT admin or web developer is installing the code, they must have a Plumb5 user account.
- If you're hosting entire domains or subdomains externally, you must also add your domain(s) and/or subdomain(s) to your settings in Plumb5.
Copy your Plumb5 tracking code
- Select Account from the Dropdown for which you would like to install tracking code
- In the Embed code section, click Copy or click Email to my web developer to send the tracking code to the team member who will be installing it on your site.

Install the tracking code using Google Tag Manager
- Follow the steps above to copy the Plumb5 tracking code in your Plumb5 account.
- In a new browser tab or window, log in to your Google Tag Manager account.
- Select your container.
- In the left sidebar menu, navigate to Tags.
- Click New.
- Click Tag Configuration.
- For the Tag type, choose Custom HTML Tag. Then, give your tag a name.
- Paste the tracking code in the HTML field.
- Below Tag Configuration, click Triggering to set up a firing rule. If you don't set up a firing rule, the tag will not fire and Plumb5 analytics data will not be collected.
- For the tag to fire on all pages with the Google Tag Manager code installed (recommended), select the option for All Pages.
- Click Save to save your new tag.
- In the upper right, click Publish to save your container and tags.
If you haven't already done so, install Google Tag Manager on your website.