Settings
Step-by-step guide to configuring Mobile Push Notification as a channel
Push Notifications are messages that pop up on mobile devices. App publishers can send them at any time, even if users are not currently active on the app or using their device.
The section has been divided into two sub-sections, Android and iOS. Here's how you can configure Push for each OS:
For Android

Step 1: Add Package Name
The Android app's application ID is also referred to as the Package Name. It can be found in your module (app-level) Gradle file, usually app/build.gradle (example package name: com.yourcompany.yourproject).
Step 2: Add FCM Server Key
The FCM Server Key is a secret code of sorts that enables your plumb5 dashboard to communicate with your Firebase project. It enables us to send the Push Campaigns for delivery to your target audience.
- It can be found under the Firebase Project > Project Settings > Cloud Messaging section in your Firebase Developers Console.
- Copy + paste it in your plumb5 dashboard.
Step 3: Click Save
For iOS
Step 1: Select APNs Authentication Type
- Select Auth Key to connect your app by uploading the Auth Key file created by your tech team.
- This method allows you to connect your app with your plumb5 account as a common Auth Key can be shared by multiple apps, registered to the same Apple Developer Console.
- Select Certificate to connect your app by uploading the APNs Push Certificate.
- This method allows you to connect only one iOS app with your plumb5 account.
- You will need to re-generate the Push Certificate every year.
If 'Auth Key' is selected at Step 1
Step 2: Upload Auth Key file
As shown above, click the Upload button to add the Auth Key file.
- You can download the Auth Key file from the Certificates, Identifiers & Profiles > Keys section in the Apple Developer Console. (Please don't rename the file).
Step 3: Add Team ID
The Team ID is located under Membership > Team ID in the Apple Developer Console.
Step 4: Add Bundle Identifier
The Bundle Identifier can be found in Xcode.
Step 5: Select Default Push Mode
As shown in the above visual:
- Select Development to test Push integration for an iOS app that's currently under development (not available for download at the app store).
- Select Production to start sending Push Notifications to all users who have downloaded your iOS app.
Step 6: Click Save
If 'Certificate' is selected at Step 1
Please get in touch with your tech team to upload the Certificate and complete configuration. APNs Push Certificate can be created through the Certificates, Identifiers & Profile > Identifiers > App ID section in the Apple Developer Console.
Create APNs Push Certificate
To create an APNs Certificate, follow the steps below:
Step 1:Log in to the Apple Developer Console and go to Certificates, Identifiers & Profiles.
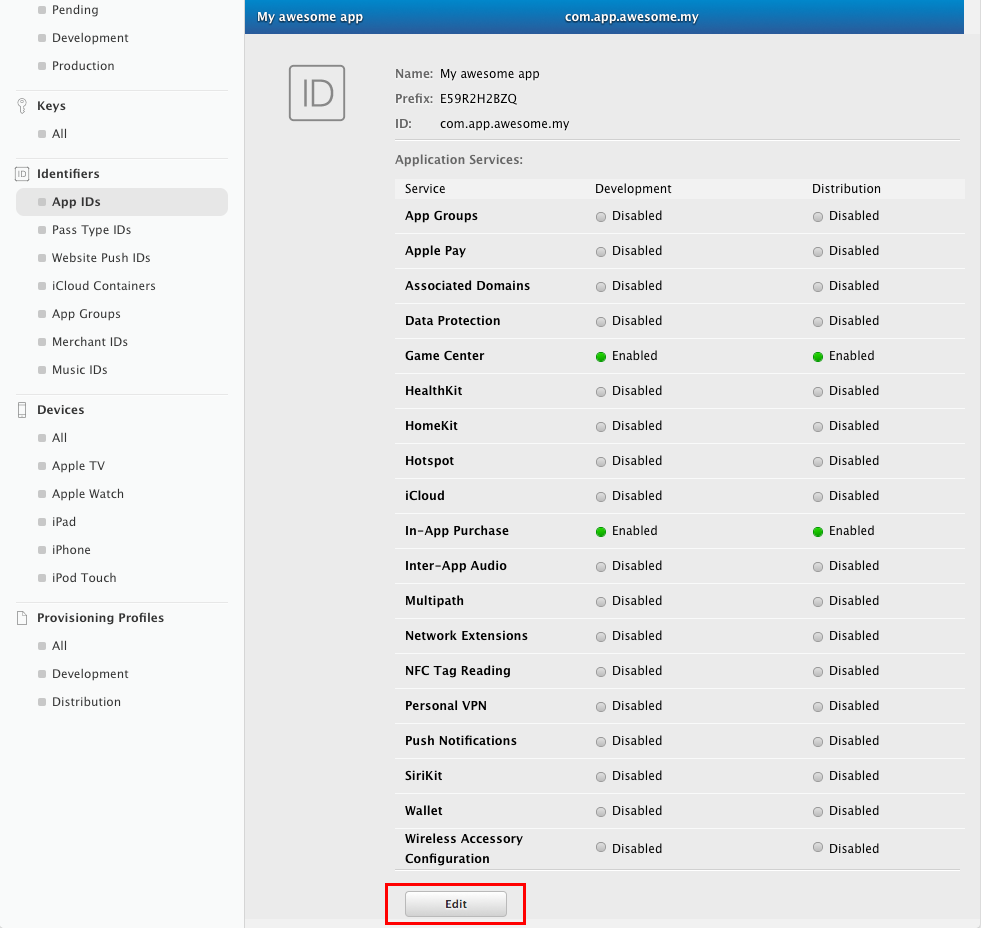
Step 2: Select Identifiers > App IDs and then select your app.
Step 3: Click Edit to update the app settings.
Step 4: If not already enabled, tick the Push Notifications service checkbox to enable it.
Step 5: If you already have a certificate created which you can use, download it and proceed to the next step. If not, click Create Certificate….
Step 6: Follow the instructions on the next web page to create a certificate request on your Mac, and click Continue.
Step 7: On the Generate your certificate page, click Choose File and choose the certificate request file you just created (with a .certSigningRequest extension) and then click Continue.
Step 8: Download the generated certificate to your Mac and then open the .cer file to install it in Keychain Access.
Upload APNs Push Certificate
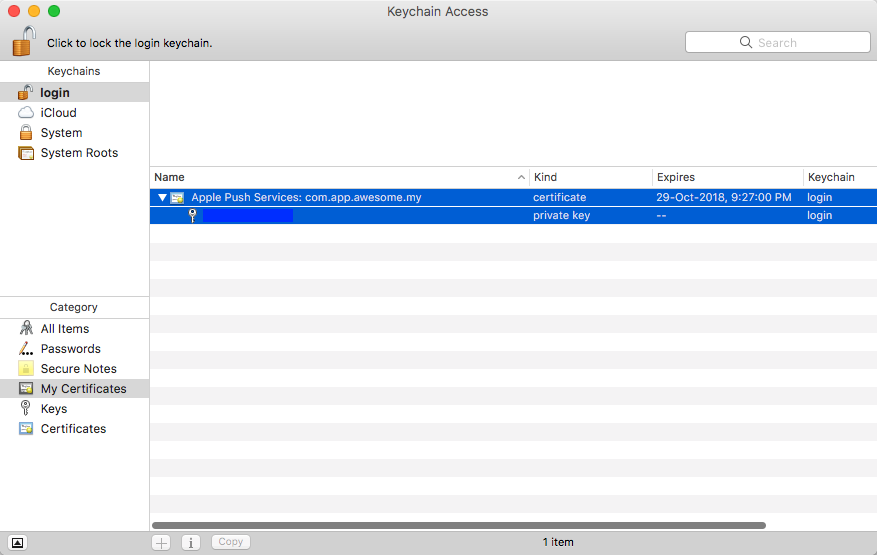
Step 1: Launch Keychain Access on your Mac.
Step 2: In the Category section, select My Certificates.
Make sure you select My Certificates on the lower left-hand side. If My Certificates is not highlighted, you will not be able to export the certificate as a .p12 file.
Step 3: Find the certificate you generated and expand it to disclose its contents. You’ll see both a certificate and a private key.
Step 4: Select both the certificate and the key, and select File > Export Items... from the menu.
Step 5: Save the certificate in the Personal Information Exchange (.p12) format. You must enter a password to protect it.
Step 6: Log in to plumb5 and navigate to Push Notifications > Settings.
Step 7: In the iOS section, select "Certificate" as APNs Authentication Type. Click the Upload button against Push Certificate and upload the certificate.
Step 8: Enter the push certificate password under Push Password and select the default push mode for sending push notifications i.e. Production or Development. Click Save.