Browser Notifications
Engage your visitors across web and mobile web with actionable web push notifications.
You can personalize all your campaigns by leveraging real-time data points related to your user's preferences and behavior. These data points are referred to as User Attributes which makes it possible for you to deliver tailored experiences at scale.
Web Push Notifications are clickable media messages that are sent to a user's desktop, mobile, or tablet through a website or web app, even when they're inactive on the site. This makes Browser Push Notifications highly visible and easy to respond to for a user. Web Push is supported by all major browsers like Chrome, Firefox, Safari (only on Mac OS X Maverick & higher versions), Microsoft Edge, Opera, UC Browser. However, media messages or notifications containing images are currently supported only by Chrome.
Dashboard
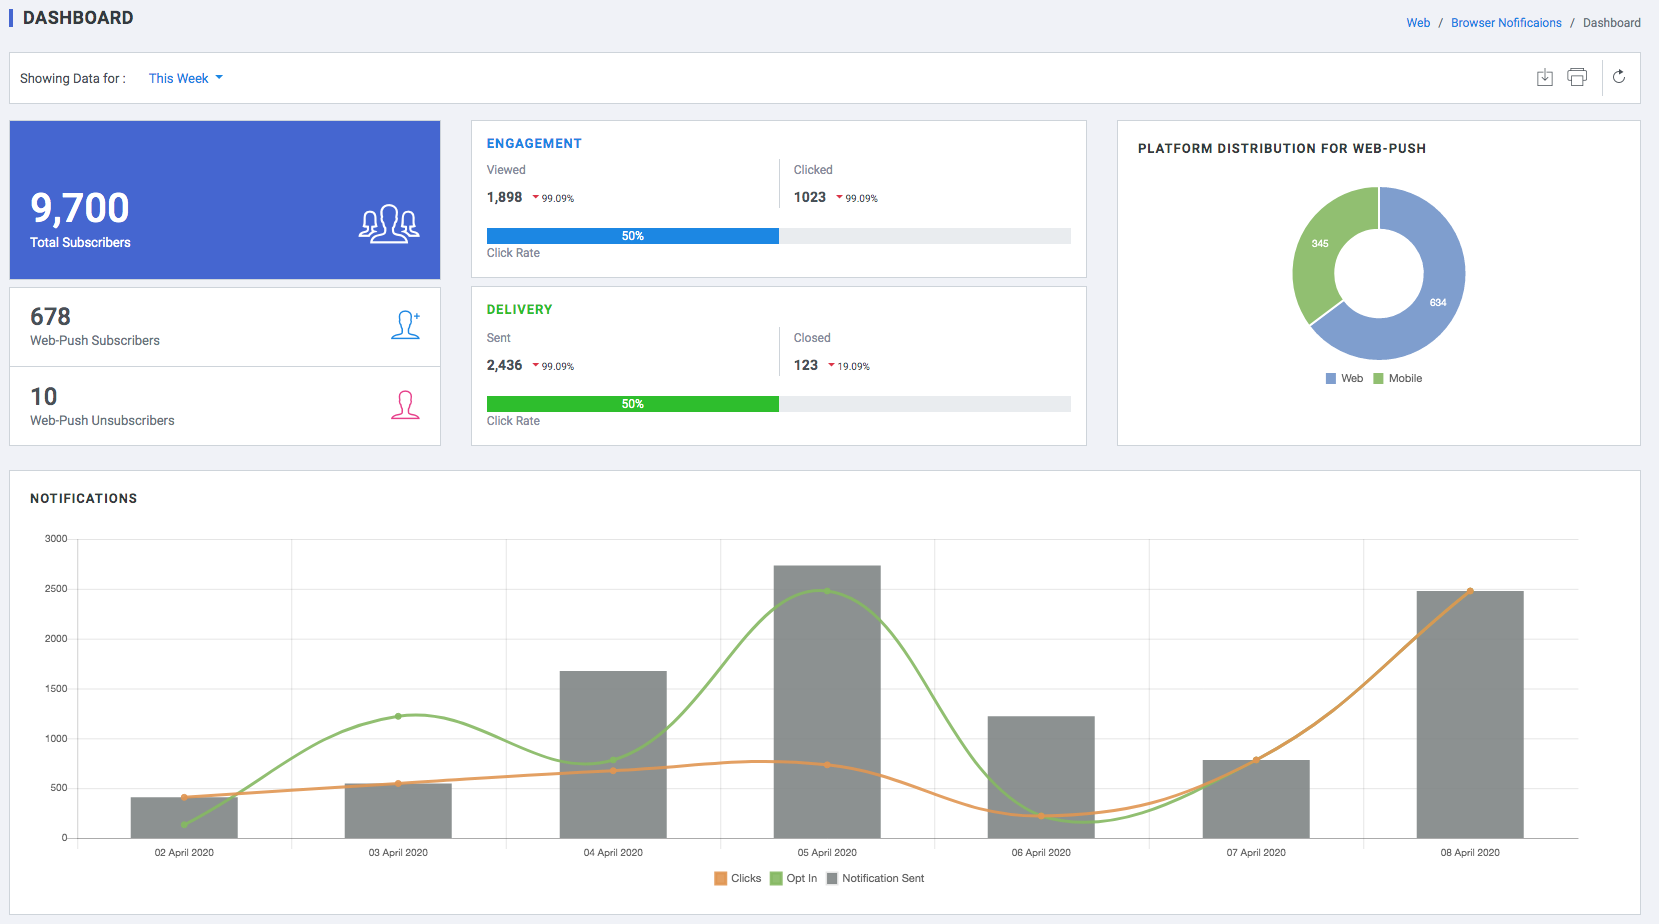
- Total Subscribers
- Web-push Subscribers
- Web-push Unsubscribers
- Engagement
- Viewed
- Clicked
- Click Rate
- Delivery
- Sent
- Closed
- Click Rate
- Platform Distribution For Web-push
- Mobile
- Web
- Notifications
- Clicks
- Opt-in
- Notifications Sent
Templates
With templates, you can save repetitive Web Push content as a template. Before sending a template, you can personalize and tailor the content to your recipients. You can access templates in the manage Notifications section.
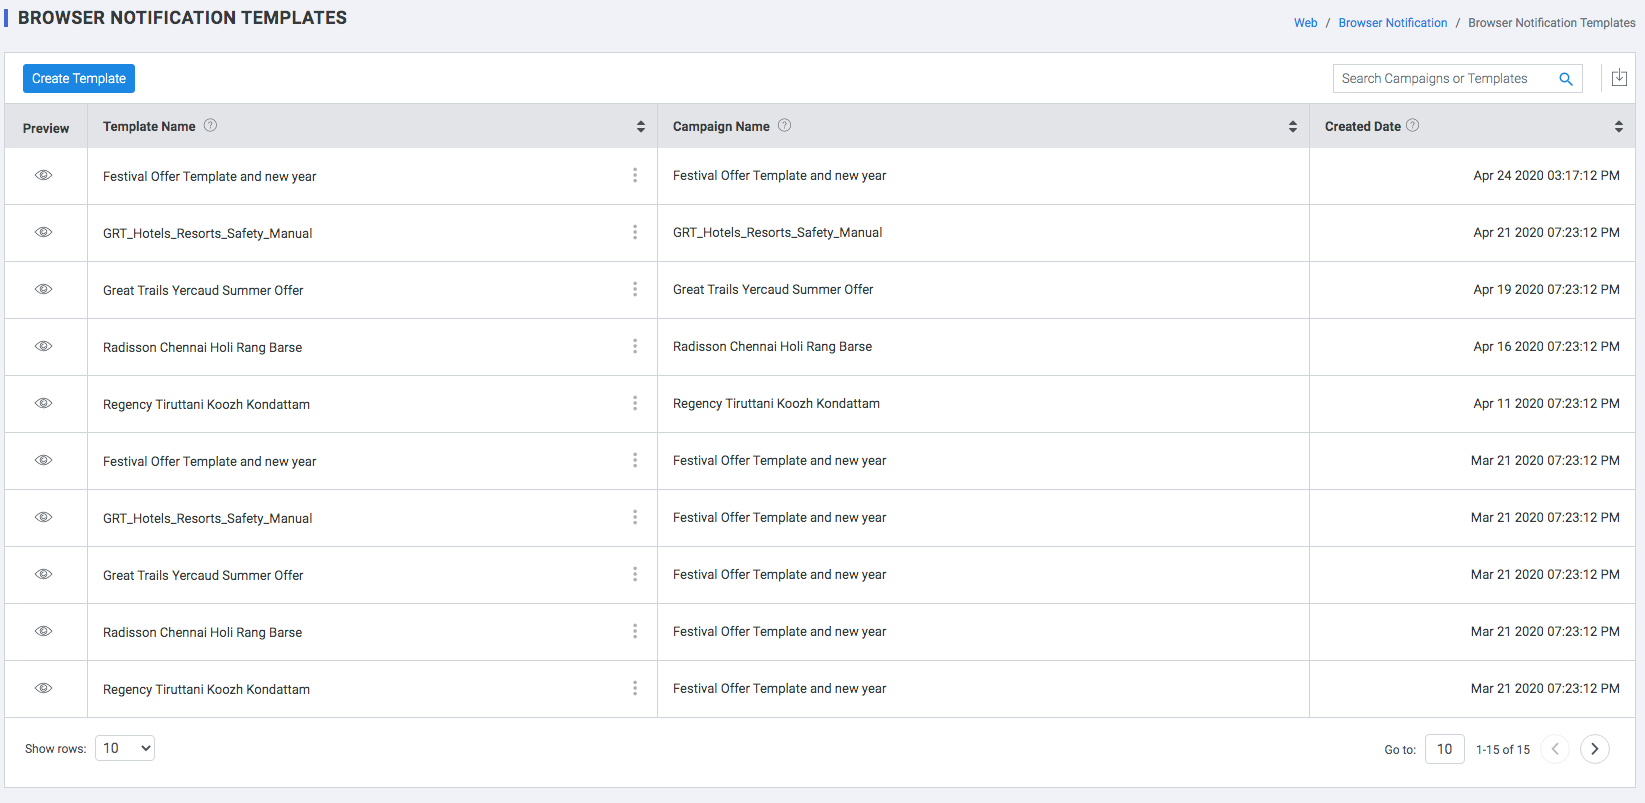
- Preview : Mouse over Preview of the Notification template.
- Template Name: Name of the template
- Campaign Name : name of the campaign associated to the template.
- Created Date: Template creation date.
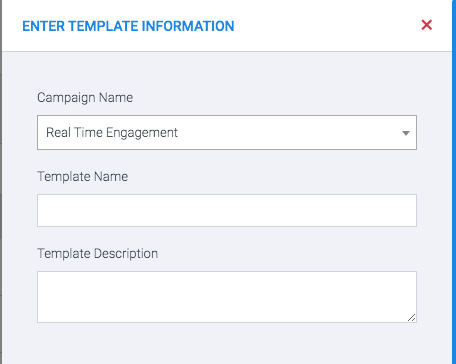
Create Template
Step 1 : Enter template details
- Campaign Name: Select Campaign name
- Template Name: Name of the template
- Template Description: Briefly describe the template.
Step 2 : Enter template details
- LAYOUT
- Notification Type
- Text: A text-only template, allows you to send quick updates and offers, personalized to each user's preferences and behavioral history.
- Text with Banner: A media template that allows you to create visually personalized notifications.
- Notification Type
- GENERAL INFORMATION
- Title: Message Title.Recommended maximum length 32 characters current count 0
- Message: Message Body.Recommended maximum length 160 characters current count 0
- Icon Image: Click the Upload button placed next to the field, image and select a file from your desktop.. Recommended size 192px X 192px JPG, JPEG, PNG formats only. Less than 1MB in size URL must begin with HTTPS
- On-Click Action: Add a link to the web page you'd like to direct users to when they click anywhere on the notification. URL can be HTTP or HTTPS
- BUTTONS: Click the toggle button to enable and add up to 2 buttons to your notification.
- Button
- Label: Label refers to the button's text or call-to-action. Recommended maximum length 22 characters current count 0
- On-Click Action: add a link to the web page you'd like to direct users to when they click on the button. URL can be HTTP or HTTPS
- ADVANCED OPTIONS
- Auto Hide:
(Applicable only to Chrome v47 & above on Windows)
Most browsers auto-hide the Web Push Notification after a few seconds of inactivity. While this is a great way to create a non-intrusive browsing experience, you can always choose to disable it. Doing so will keep the notification visible until a user clicks on it or dismisses it.
- Android Badge:
(Applicable only to Android v6+ users on Chrome v56+).
If you're targeting a large number of Android users, then you can easily choose to replace the Chrome badge with a custom badge that resonates with your brand. This is a great way to subtly enforce brand recall for your users while engaging them within tailored communication.
- Default
- Custom
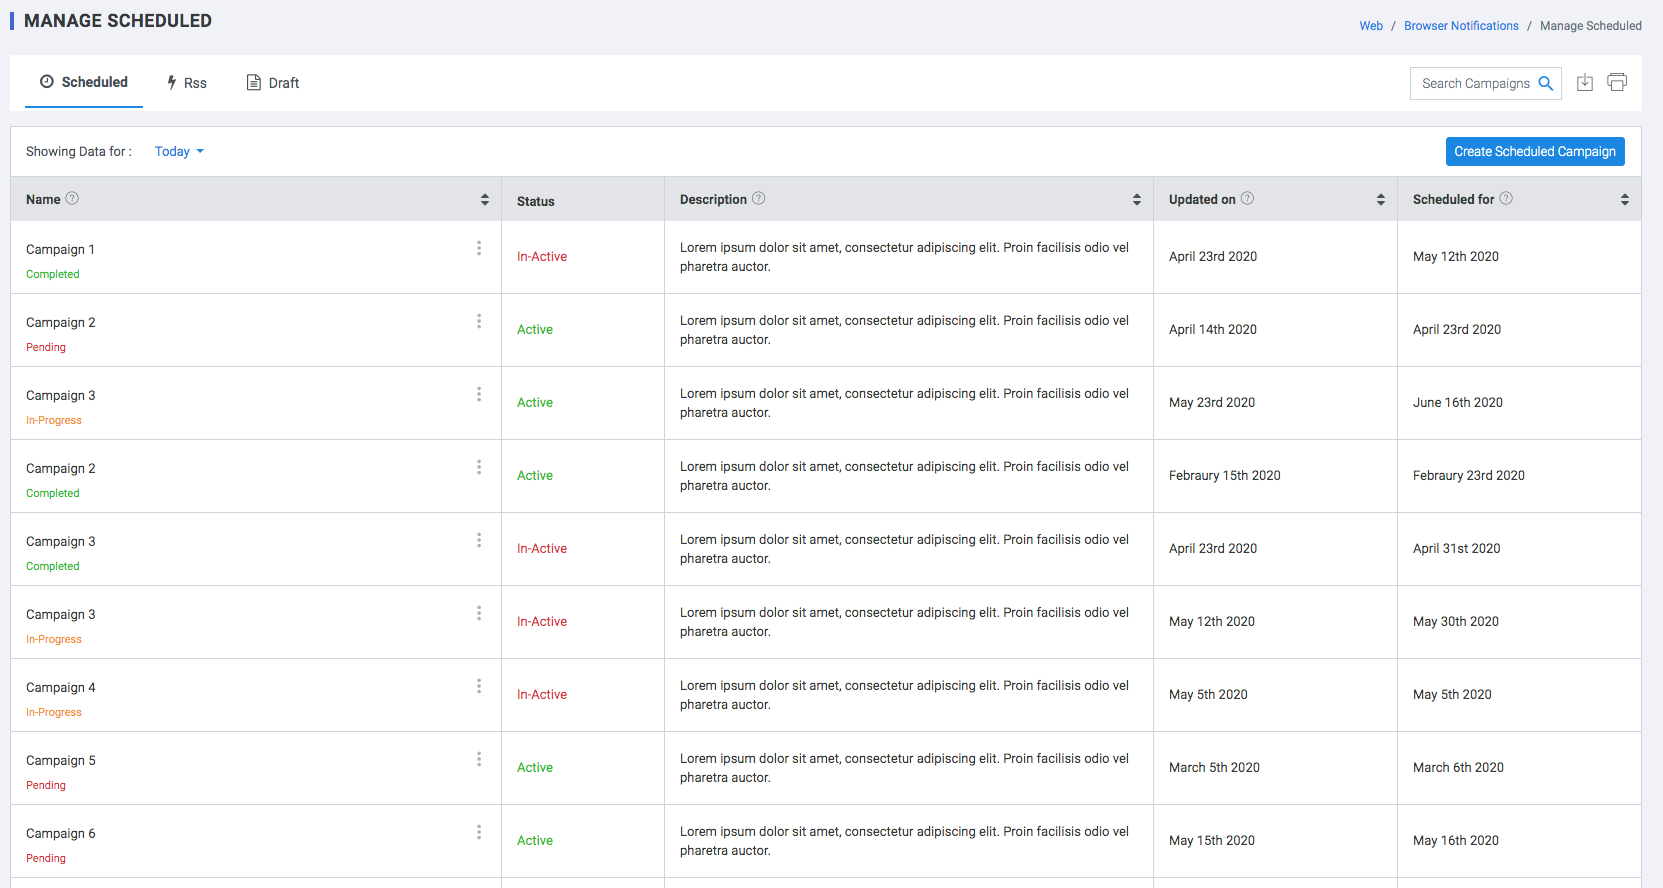
Manage Notifications
Select Campaign Type
Scheduled Campaigns
These are stand-alone messages that are sent to your users only once and generally consist of time-bound offers, product updates, and so on. Such campaigns end as soon as they're delivered to the target audience.
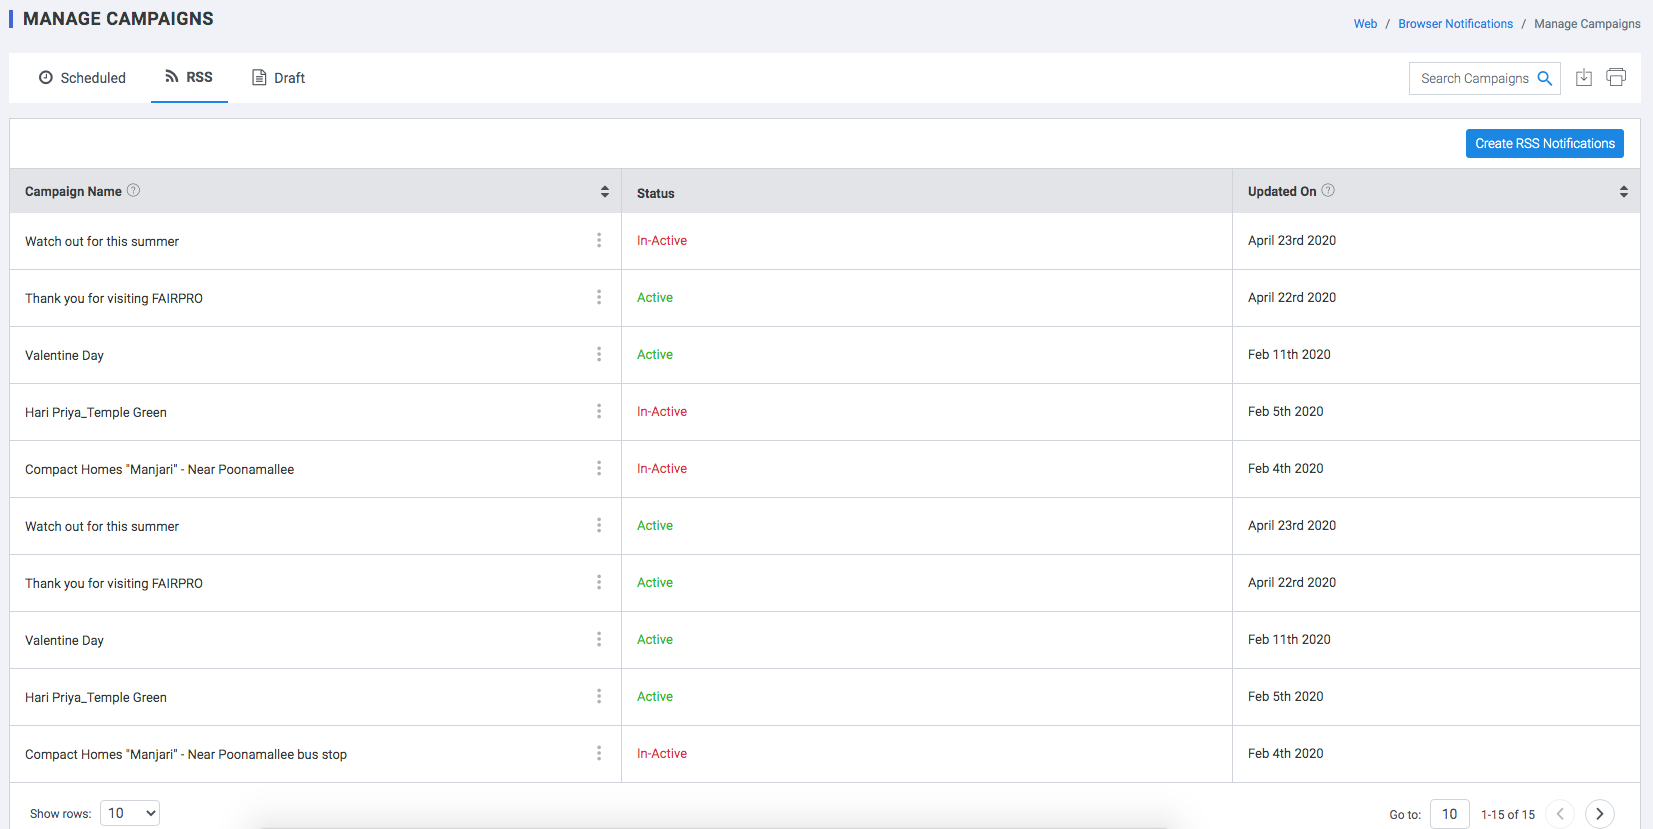
RSS
These are ongoing cycles of communication that are sent to only those users of your target audience, who perform a particular event on your app/website.
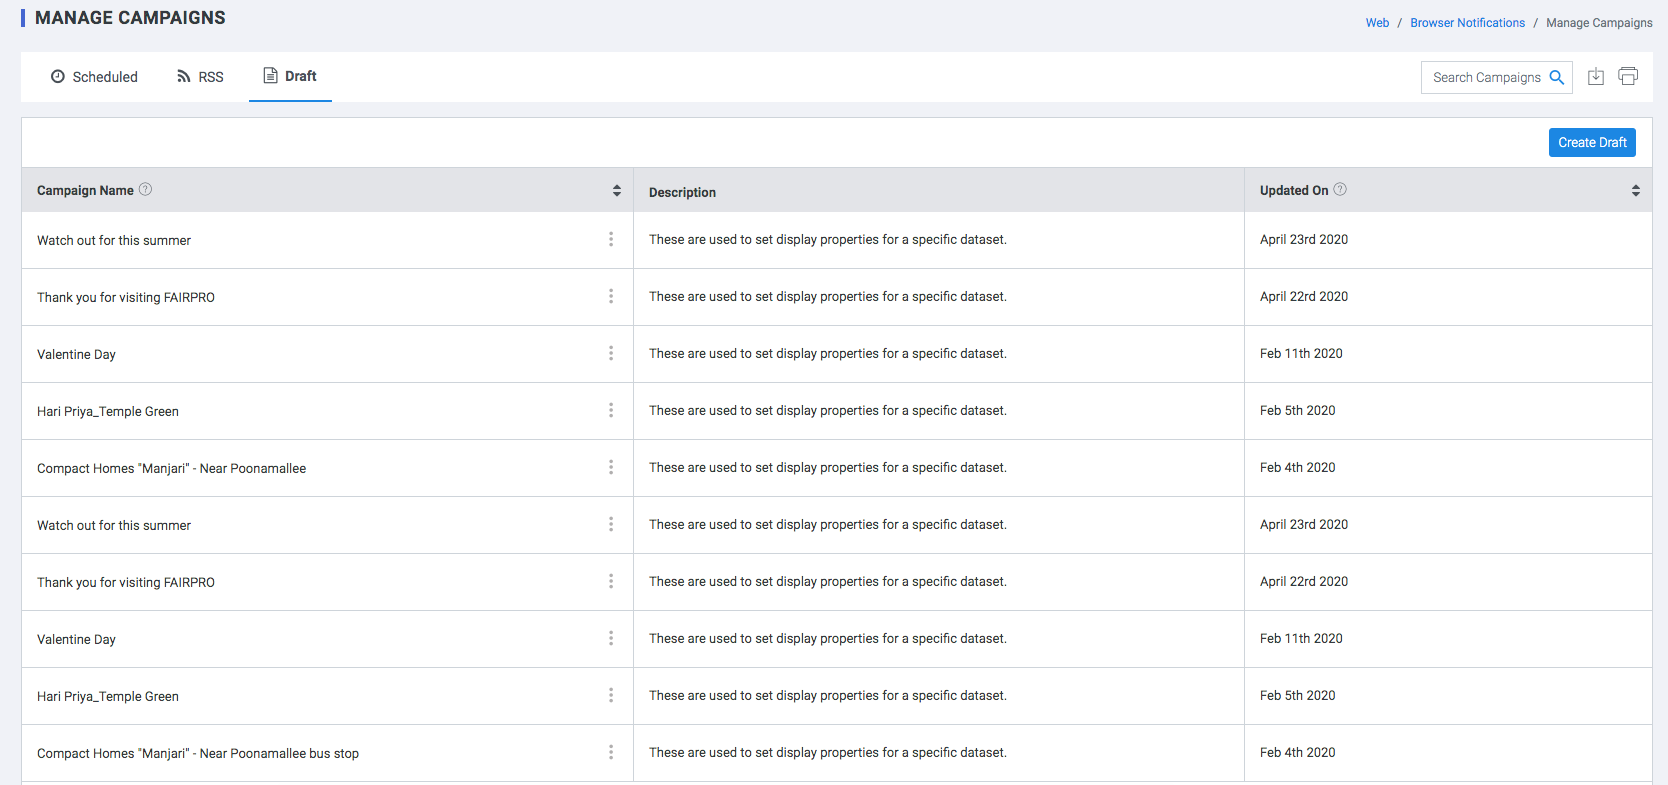
Draft
This is a draft campaign that can be saved for editing at a later time.
Create Scheduled Campaigns
-
Step 1 - Campaign information
- Campaign Identifier: Select a unique Campaign identifier
- Campaign Name: Select a Campaign Name from the list of campaigns created
- Select Template : Select from list of templates created previously.
- Send To : Select single or multiple Groups to send mail to
-
Step 2 - Schedule
- Delivery Date: Specify the delivery date
- Delivery Time: Specify the delivery time
-
Step 3 - Preview & Test
Test the campaign by sending it to an internal group of Email Address.
Create RSS Campaigns
-
Step 1 - Campaign information
- RSS URL : URL of the RSS notification feed. URL can be HTTP or HTTPS.
- Check Rss Feed Every: Frequency for checking RSS feed for update. Select the refresh frequency in hours and Minutes
-
Step 2 - Options
- Auto Hide:
(Applicable only to Chrome v47 & above on Windows)
Most browsers auto-hide the Web Push Notification after a few seconds of inactivity. While this is a great way to create a non-intrusive browsing experience, you can always choose to disable it. Doing so will keep the notification visible until a user clicks on it or dismisses it.
- Android Badge:
(Applicable only to Android v6+ users on Chrome v56+).
If you're targeting a large number of Android users, then you can easily choose to replace the Chrome badge with a custom badge that resonates with your brand. This is a great way to subtly enforce brand recall for your users while engaging them within tailored communication.
- Default
- Custom
-
Step 3 - Preview & Test
Test the campaign by sending it to an internal group of Email Address.
Create Draft
Create a draft campaign for future editing.
- Campaign Name : Add a unique campaign Name
- Campaign Description: Add a brief description of the campaign.
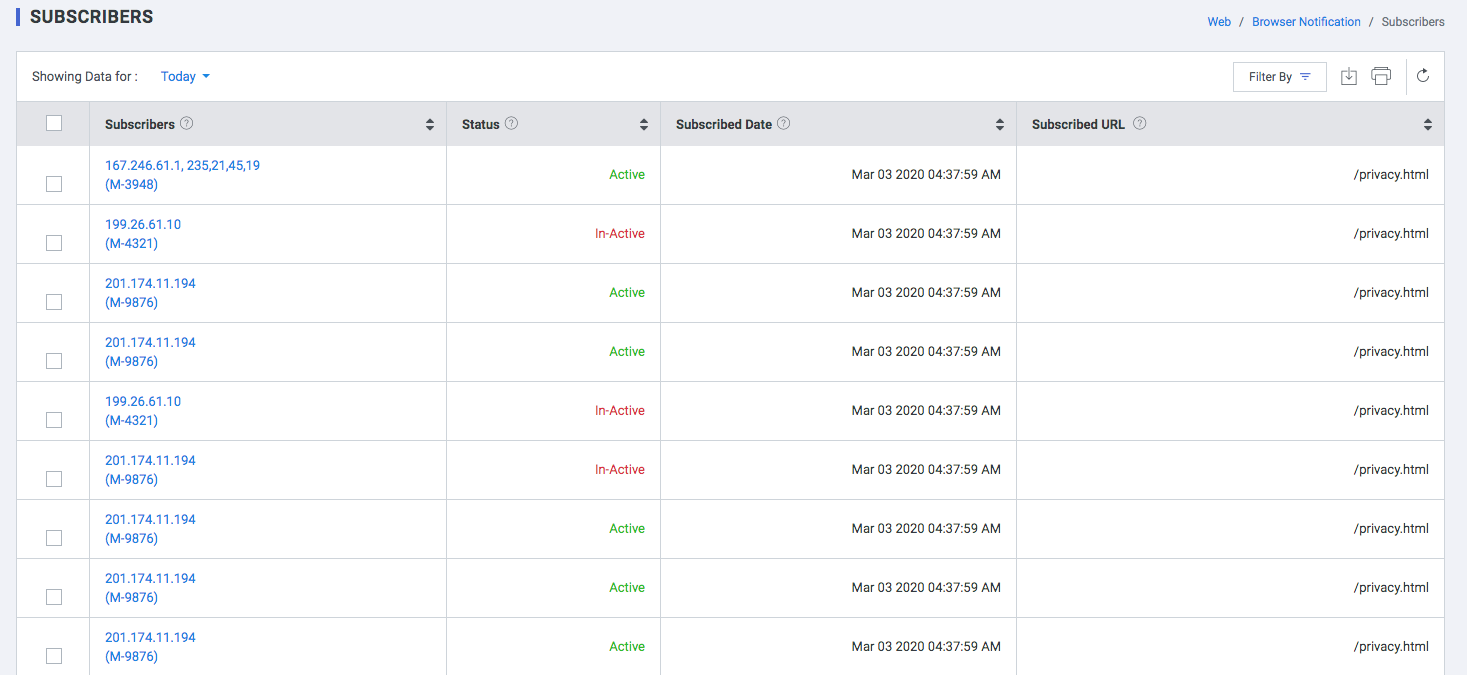
Subscribers
This section presents a top-level view of your subscribers against important parameters like:
- Subscribers: Unique Identification.
- Status: Active or Inactive
- Subscribed Date: Date when the user subscribed to the notification
- Subscribed URL: The URL of the page from where the user subscribed.
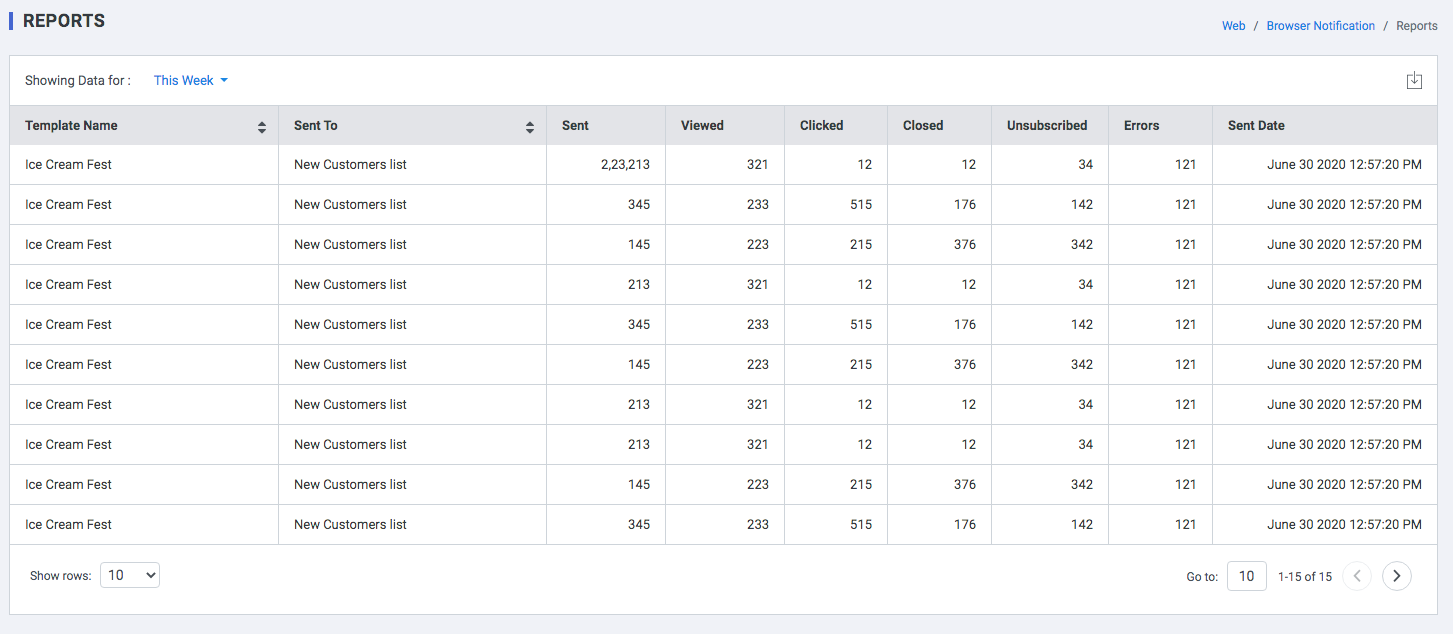
Reports
Template wise performance report.
- Template Name: Name of the template.
- Sent To: Send to groups.
- Sent: No. of notifications sent.
- Viewed: No. of notifications viewed.
- Clicked: No. of notifications Clicked.
- Closed: No. of notifications closed without viewing.
- Unsubscribed: No of opt-out users.
- Errors : Delivery error.
- Sent Date: Notification sent date.
Settings
A step-by-step guide to configuring Web Push.
Step 1: Enable Web Push
Click the toggle button to enable Web Push Notifications for your domain.
Step 2: Select Opt-in Type
Depending on whether or not you have an HTTPS domain, Web Push opt-ins can be collected in two ways:
- Directly through Browser-based opt-in prompts. (1-Step Opt-in)*
- In-directly through an On-site Notification (shown by Plumb5) that initiates the opt-in process. Users are then led to the Native Browser opt-in prompt to complete the subscription. (2-Step Opt-in)
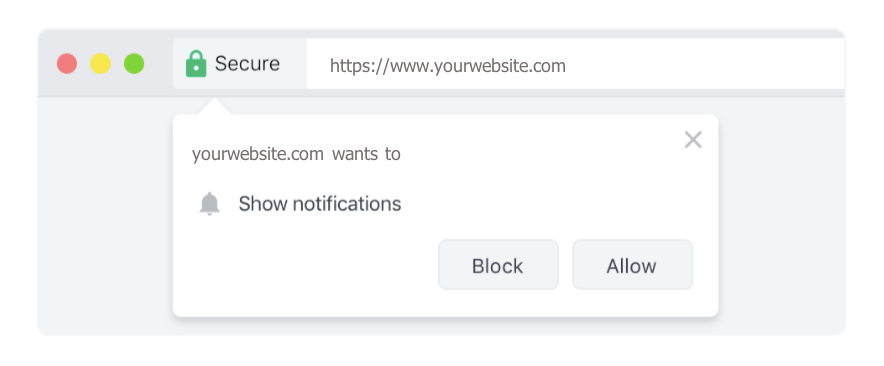
How 1-Step Opt-in Works
(works for only HTTPS websites/ sites that have SSL Certificate)
The opt-in model enables users to subscribe by simply clicking the Allow button on the native prompt shown by their browser.
How 2-Step Opt-in Works
(works for both HTTP & HTTPS domains)
Since Web Push Notifications are not supported for HTTP sites, we created the 2-step opt-in model to enable messaging for such domains.

This model requires users to subscribe to your channel in 2 steps:
- Step 1: User is prompted by an intermediary On-site Notification (triggered by Plumb5) that conveys why they should subscribe to your Web Push Notifications.Once they click the Allow button on the On-site Notification, the user is prompted by the browser-based native prompt.
- Step 2: The user will need to click the Allow button* on the second prompt to confirm their subscription.
Step 3: Configuration
-
1- Step
Add the below code snippet under the root directory of your website.
importScripts('https://clientwebsitename.plumbt.in/P5_Sw.js');
- Please create a service worker file if it doesn't exist.
- Please ensure that the P5_Sw.js file is publicly accessible to ensure that you can send Web Push campaigns through your Plumb5 dashboard.
-
2-Step
- Http only
- Add Sub-Domain Name: Any subdomain name you like.
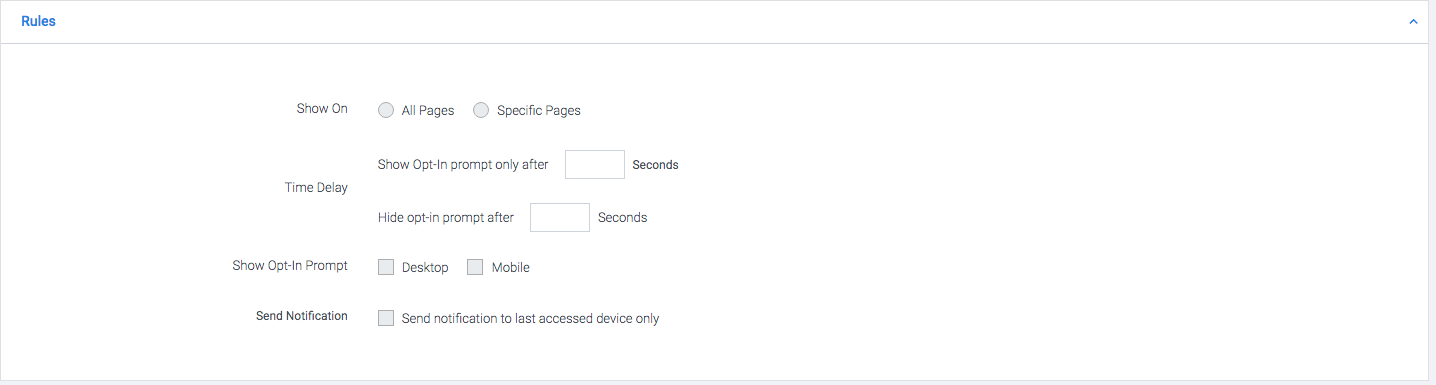
Step 4: Rules (Step 1 & Step 2)
- Show On
- All Pages: Select All Pages to show the opt-in prompt as soon as a user lands on a webpage
- Specific Pages: Select Specific Page to selectively curate only those users as subscribers who visit certain pages of your website
- Time Delay:You can choose to delay the appearance of the opt-in prompt by a few seconds after a user lands on a webpage. As highlighted below, specify the duration
- Show Opt-In prompt only after Seconds
- Hide opt-in prompt after Seconds
- Show Opt-In Prompt
- Desktop
- Mobile
- Send Notification: Send notification to last accessed device only
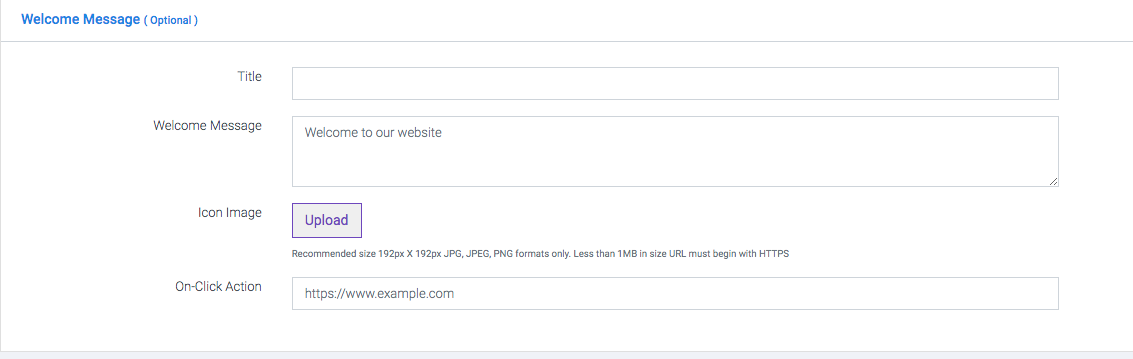
Step 5: Welcome Message(1- Step & 2- Step) - Optional
- Title: Title of the Message
- Welcome Message: Message to be displayed.
- Icon Image: Upload Icon.Recommended size 192px X 192px JPG, JPEG, PNG formats only. Less than 1MB in size URL must begin with HTTPS
- On-Click Action: Call to Action URL.
Step 6: Notification Settings ( 2- Step) - http & https
- Opt-in Prompt Type
- Box: Onsite box shaped prompt
- Bell: Bell shaped Prompt
- Position: Customize the position by selecting an option from the field, Position.
- Bottom Left
- Bottom Right
- Top Left
- Top Middle
- Top Right
- Message: Add a custom message for the prompt in the field, Message.
- Allow Button Text: Change the Allow Button Text to something more warm and friendly.
- Don't Allow Button Text:Change the Don't Allow Button Text to something less dismissive
- Customize the Prompt: Change background and text as per your brand guidelines through the fields, Background Color, and Text Color, respectively.
- Body Background Color
- Body Text Color ( bell prompt only)
- BTN Background Color
- BTN Text Color
Step 7: Native Browser Prompt for Opt-In (2-step) - http only
for Firefox 72+ & Chrome 80+
Firefox v72+ and Chrome 80+ do not allow the native browser opt-in prompt to be shown without explicit permission from a user. Hence, you will need to set up a preceding opt-in prompt for it.
- Message: Add a custom message for the prompt in the field, Message.
- Icon: Upload Icon.Recommended size 192px X 192px JPG, JPEG, PNG formats only. Less than 1MB in size URL must begin with HTTPS
- Background Color: Customize background color
- Text Color: Customize text color